Progressive Muscle Relaxation: Easy-Step Checklist for Calmer Body and Mind
Progressive muscle relaxation (PMR) is a simple, body-based practice that helps reduce physical tension and quiet stress signals by tensing and releasing muscle groups in a steady sequence. It’s especially helpful when your mind feels busy but your body is the part that won’t “unclench.” The routine below breaks PMR into an easy checklist you can use in 5–15 minutes—before bed, during a midday reset, or anytime your nervous system feels stuck in high gear.
What Progressive Muscle Relaxation Is (and Why It Helps)
PMR works by pairing a brief muscle contraction with a longer release. That contrast teaches your nervous system what “letting go” actually feels like in the body, not just as an idea. Over time, many people get better at noticing early signs of tension and softening them sooner.
- PMR uses short tension (a few seconds) followed by a longer release (often 10+ seconds), helping the body recognize and reduce held tightness.
- Common benefits include less muscle tension, improved sleep readiness, lower perceived stress, and better awareness of early anxiety cues.
- Short, consistent practice tends to work better than occasional long sessions.
- PMR pairs well with slow breathing, mindfulness, and a calming environment—no special equipment required.
For more background on relaxation techniques and stress support, the American Psychological Association and the National Center for Complementary and Integrative Health offer helpful overviews.
Before You Start: Set Up for a Smooth Session
A calm setup makes PMR feel easier and more effective—especially if you’re doing it quickly between tasks.
- Choose a position: seated with feet on the floor or lying down with arms relaxed at your sides.
- Unclench the jaw and soften the tongue (resting lightly on the roof of the mouth); let shoulders drop away from the ears.
- Use a gentle breathing pace: inhale through the nose, exhale slowly (a slightly longer exhale often feels more settling).
- Aim for “firm but not painful” tension. The goal is contrast, not strain.
- If a muscle group is injured or sensitive, skip it or use a smaller, safer contraction.
Quick PMR Timing Guide (Flexible, Not Rigid)
| Step |
Suggested timing |
What to notice |
| Tense |
3–5 seconds |
Where effort shows up (tightness, pressure, trembling) |
| Release |
10–15 seconds |
Warmth, heaviness, softening, slower breath |
| Pause |
1–2 breaths |
Difference between tension and ease before moving on |
Easy-Step PMR Checklist (10-Minute Flow)
Move from top to bottom (or bottom to top if that feels more natural). Keep each contraction gentle and controlled, then make the release longer than the tension.
- Hands: make gentle fists; release and let fingers lengthen.
- Forearms: bend wrists slightly or tighten forearms; release and feel the palms soften.
- Upper arms: gently tighten biceps/triceps; release and let arms feel heavy.
- Shoulders: lift toward ears (small movement); release and feel shoulders drop.
- Face: squeeze eyes shut and scrunch nose lightly; release and smooth the brow.
- Jaw: gently clench teeth or press tongue to roof of mouth; release and part lips slightly.
- Chest/upper back: inhale and hold a mild chest expansion; exhale fully and release.
- Stomach: tighten abdominal muscles; release and allow the belly to soften.
- Hips/glutes: gently squeeze; release and let hips settle.
- Thighs: press legs down or tighten quads; release and feel heaviness.
- Calves: point toes up or down gently; release and soften ankles.
- Feet: curl toes; release and spread toes naturally.
- Finish: scan from head to toe, noticing any area that wants a second, gentler round.
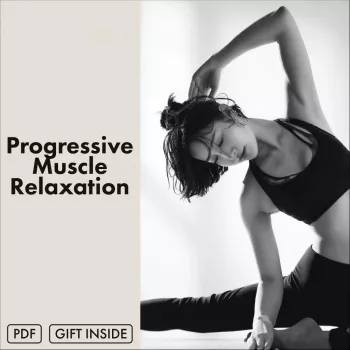
If you want an easy reference you can follow without memorizing the order, use Progressive Muscle Relaxation: Easy-Step Checklist (digital download) for simple cues and a consistent sequence.
Common Sticking Points and Simple Fixes
- “I can’t feel the difference.” Shorten the tension, lengthen the release, and keep contractions mild. Put most of your attention on the exhale during the release.
- “It makes me more anxious.” Start with smaller muscle groups (hands/feet) and avoid breath-holding. Make sure the room is comfortably warm.
- “My mind wanders.” Use one phrase per step (for example, “tight… release”) or count slowly during the release phase.
- “I don’t have time.” Do a 3-step mini version—shoulders, jaw, hands—then a 30-second body scan.
- “I fall asleep.” Practice earlier in the day or sit upright. At bedtime, drifting off can be a feature rather than a problem.
When to Use PMR (Practical Scenarios)
To make the space feel more calming, a soft scent and subtle humidity can help you settle into the routine. The Mini USB Aroma Humidifier & Essential Oil Diffuser with Soft LED Light is an easy add-on for a nightstand or desk. If you want a reliable power option for multiple devices, the 65W GaN USB C Fast Wall Charger with Quick Charge can keep your setup simple.
Safety Notes and Gentle Modifications
For a clinician-reviewed overview of PMR basics, the Cleveland Clinic’s PMR guide is a solid reference.
Downloadable Checklist for Ongoing Support
Get the guided format here: Progressive Muscle Relaxation: Easy-Step Checklist (digital download).
FAQ
How long should progressive muscle relaxation take?
Most sessions take 5–15 minutes, but even 2–3 minutes can help on busy days. A consistent short routine often works better than a longer practice done only occasionally.
Can progressive muscle relaxation help with anxiety symptoms?
It can help calm the body side of anxiety by reducing muscle tension and “revved up” physical cues that feed the stress loop. It’s a supportive tool, but it isn’t a substitute for professional care if anxiety symptoms are severe or worsening.
Should the muscles be tensed as hard as possible?
No—use “firm but comfortable” tension and avoid pain or strain. If an area feels sensitive, use a gentler contraction or skip that muscle group and focus on the release instead.
Recommended for you










Leave a comment