Clean lines and crisp details can make even simple gel designs look salon-finished. A double-end liner brush paired with a microfiber wool tip helps with both precision painting and quick cleanup, making it easier to create stripes, swirls, French lines, and small accents without constantly switching tools. If detailed gel art usually turns into “good from far away,” this is the kind of tool that helps you tighten the edges and keep your design intentional.
What This Double-End Brush Helps You Do
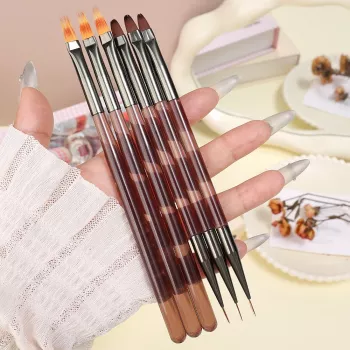
A liner brush is built for control. The fine bristles hold a small amount of gel paint so you can place color exactly where you want it, while the microfiber wool end supports quick corrections before curing.
- Create thin, controlled lines for gel nail art details like outlines, grids, and lettering-style accents
- Add definition around color blocks and French edges with a steadier, finer stroke
- Use the microfiber wool end to tidy small mistakes, soften edges, or remove stray gel before curing
- Reduce tool switching during a set by combining a detail brush and cleanup tip in one handle
For a compact, budget-friendly option, see the Double-End Nail Art Liner Brush with Microfiber Wool for DIY Gel Nail Art.
Design Ideas That Work Especially Well with a Liner Brush
Some nail art styles look complicated, but they’re mostly about consistent line width and clean boundaries—exactly what a liner brush is meant to do.
- Micro-French tips: draw a thin smile line and reinforce the edge for symmetry
- Marble veining: pull delicate veins through a sheer base without over-blending
- Abstract waves: alternate thin and medium-thin strokes for a layered look
- Outline-and-fill: outline shapes first, then fill with color for sharper borders
- Negative space lines: keep gaps clean by sketching borders before painting
How to Use It for Gel Nail Art (Step-by-Step)
- Prep the nail: finish base color and ensure the surface is smooth and cured as needed for your gel system.
- Load the liner end lightly: use a small amount of gel paint; wipe excess so the brush doesn’t flood.
- Anchor your hand: rest your pinky or side of your hand on the table to steady the stroke.
- Use light pressure: let the bristles glide; pressing too hard widens the line and causes skipping.
- Fix mistakes before curing: use the microfiber wool end to remove tiny slips or refine edges.
- Cure and seal: once details look clean, cure fully and apply top coat for durability.
Quick Technique Guide
| Goal |
Brush Handling |
Common Fix |
| Ultra-thin lines |
Very light pressure; minimal gel load |
If lines break, reload lightly and overlap the gap |
| Crisp French edge |
Short strokes along the curve |
Use microfiber wool to sharpen the border before curing |
| Swirls and waves |
Continuous motion; rotate finger instead of twisting wrist |
If the curve wobbles, refine with tiny corrective strokes |
| Outlining shapes |
Outline first, then cure |
Clean corners with microfiber wool for sharper angles |
Microfiber Wool End: When and How to Use It
The microfiber wool side is your “before it’s permanent” helper. Because gel stays workable until cured, small cleanups can be quick—as long as they’re precise and gentle.
- Clean up sidewalls: remove gel that drifted near the cuticle or side edges before curing
- Sharpen borders: lightly trace along a line to make it cleaner without removing the whole detail
- Soften harsh edges: gently dab to blur a tiny area for a more gradient look (works best pre-cure)
- Keep it precise: use small, controlled touches; avoid rubbing large areas to prevent smearing
If your gel gets on skin, it’s smart to clean it up promptly before curing. For general nail product safety and care guidance, the FDA’s nail care products page is a helpful reference, and the American Academy of Dermatology’s nail care tips cover everyday habits that help keep nails and surrounding skin in good condition.
Care and Cleaning for Better Lines Over Time
Fine liner brushes perform best when the tip stays pointed and flexible. Gel residue is the fastest way to ruin that.
- Clean immediately after use: gel residue can stiffen bristles and ruin fine-line control
- Use a suitable brush cleaner: avoid harsh soaking that may weaken the brush over time
- Reshape the bristles: gently form a point after cleaning so the liner stays accurate
- Cap and store safely: protect both ends to prevent fraying and lint pickup
- Replace when performance drops: if the tip splits or won’t form a point, lines will look uneven
Who It’s Best For
Common Issues and Fast Fixes
More Handy Finds (In Stock)
FAQ
Can the microfiber wool end be used to clean gel near the cuticle?
Yes—use gentle, controlled touches to lift stray gel before curing, keeping the cleanup motion away from the cuticle edge rather than pushing product into it. Use the tip lightly and focus only on the small area that needs correction.
What’s the best way to get very thin gel lines without streaks?
Use a very small gel load, keep pressure light, and anchor your hand so the brush glides steadily. If the line looks uneven, build it in two thin passes and re-shape the brush tip so it comes to a clean point.
How should a nail art liner brush be cleaned after gel use?
Clean it promptly with an appropriate brush cleaner and wipe until no residue transfers, then gently reshape the bristles into a point. Cap and store it so the tip stays protected and doesn’t pick up lint.
Recommended for you


Leave a comment